Mungkin anda sudah banyak yang tau juga cara ini. Tutorial atau sekedar informasi tentang bagaimana cara menambahkan gambar pada ekplorer di komputer anda. (lihat Screen Shoot)
Thanks......By : Bembenk
Membuat Background Gambar Di Ekplorer
Belajar Mambo / Joomla Yuk di 000 Webhost
Kalo kalian pengen belajar joomla or mambo atau CMS lainnya tapi ga punya server. Ga perlu sedih karena ada tempat hosting yang memberi layanan super heboh. Di jamin 100% karena saya sudah membuktikannya sendiri.
Biar ga penasaran buruan daftar aja di 000Webhost.com
Untuk Tutorialnya bisa di lihat di sini
http://bambangoke.blogspot.com/search/label/joomla%20mambo
Thanks......By : Bembenk
Membuat Side Bar News Update Dengan gAjax RSS Ticker
Lagi berkunjung ke blognya Nyahoo ngeliat ada sidebar dengan judul New Update (Berita Baru Dari Blog Kita Dengan Tampilan Text Slide Show Gitu ) Jadi Pengen, Terus iseng Klik Kana di blognya View Source dan cari New Update
Dapet Kodenya
<h2 class='title'>News Update</h2>
<div class='widget-content'>
<script type="text/javascript">
var cssfeed=new gfeedrssticker("example1", "example1class", 4000, "_new")
cssfeed.addFeed("Bambang Oke", "http://www.bambangoke.blogspot.com/rss.xml") //Specify "label" plus URL to RSS feed
cssfeed.addFeed("Photoshop", "http://www.bambangoke.blogspot.com/rss.xml") //Specify "label" plus URL to RSS feed
cssfeed.displayoptions("date label snippet ") //show the specified additional fields
cssfeed.setentrycontainer("DIV") //Wrap each entry with a DIV tag
cssfeed.filterfeed(10, "date") //Show 10 entries, sort by date
cssfeed.entries_per_page(1)
cssfeed.init()
</script>
</div>
Terus Aku Buka Bloger Home kemudian Kilk Layout, Add Page Element, Html/Java script
Kemudian Aku Paste Kode tersebut, Save. Tapi yang keluar hanya judulnya new Update Dan isinya Kosong :(. Liat2 Lagi ada script lain yang di butuhkan. Yaitu Pake java scipt dari gAjax RSS Ticker (hosted)Author: Dynamic Drive
Description: gAjax RSS Ticker is a flexible RSS ticker that's extremely easy to set up to boot. Using the gAjax RSS Displayer script engine, there's nothing to install or host on your server. Furthermore, you can display results from multiple feeds intermixed, sort them in a variety of ways, specify how many entries to show at once, what portion of each entry to show etc.
Here's a summary of the features of this script:
* Uses the gAjax RSS Displayer engine and Google Ajax Feed API to host/cache the desired RSS feeds, so you don't have to install or host anything on your own server.
* Specify multiple RSS feeds to display, with the results intermixed.
* Sort the results either by "date", "title", or a custom "label" assigned to each feed (ie: "Digg" then "Slashdot").
* Set the number of total RSS entries to show. If multiple feeds are specified, that number is spread out evenly amongst the feeds.
* Set the number of RSS entries to show at once (default is 1).
* Specify which portions of each RSS entry to show, such as its "label", "date", "description", "snippet" and more.
* Supports multiple gAjax RSS ticker instances on the same page.
Saya Akan Jelaskan Langkah-langkahnya :
1. Masuk Ke Layout Blogger, Klik Edit HTML cari Kode ]]></b:skin>
Kemudian Copy Paste Tepat di bawahnya Kode Berikut Ini
</script><script src='http://www.google.com/jsapi?key=YOUR-API-KEY' type='text/javascript'>
</script>
<script src='http://bambangeko05.googlepages.com/gfeedfetcher.js' type='text/javascript'/>
<script src='http://bambangeko05.googlepages.com/gajaxticker.js' type='text/javascript'>/***********************************************
* gAjax RSS Feeds Displayer- (c) Dynamic Drive (www.dynamicdrive.com)
* This notice MUST stay intact for legal use
* Visit http://www.dynamicdrive.com/ for full source code
***********************************************/</script>
<style type='text/css'>.labelfield{ /*CSS for label field in general*/
color:brown;
font-size: 90%;
}.datefield{ /*CSS for date field in general*/
color:gray;
font-size: 90%;
}#example1 li{ /*CSS specific to demo 1*/
margin-bottom: 4px;
}#example2 div{ /*CSS specific to demo 2*/
margin-bottom: 5px;
}#example2 div a{ /*CSS specific to demo 2*/
text-decoration: none;
}#example3 a{ /*CSS specific to demo 3*/
color: #D80101;
text-decoration: none;
font-weight: bold;
}#example3 p{ /*CSS specific to demo 3*/
margin-bottom: 2px;
}code{ /*CSS for insructions*/
color: red;
}</style>
YOUR-API-KEY bisa di dapat di Alamat INI kemudian gantikan code YOUR-API-KEY dengan Kode yang di berikan.
Kemudian Klik Simpan Template.
Kembali Ke Layout Elemen Halaman, Klik Tambah Elemen Halaman
Isi Judulnya dengan "News Update"
Dan Kontennya dengan
<script type="text/javascript">
var newsfeed=new gfeedrssticker("example3", "example3class", 2500, "_new")
newsfeed.addFeed("Bambang Oke", "http://www.bambangoke.blogspot.com/rss.xml") //Specify "label" plus URL to RSS feed
newsfeed.displayoptions("datetime snippet") //show the specified additional fields
newsfeed.setentrycontainer("p") //Display each entry as a paragraph
newsfeed.filterfeed(20, "date") //Show 8 entries, sort by date
newsfeed.entries_per_page(1)
newsfeed.init() //Always call this last
</script>
Ganti yang di tebalkan dengan Alamat Blog Anda
Tutorialnya dari sini Dinamic Drive
Thanks......By : Bembenk
Membuat Portable Photoshop CS 2 Sendiri 26 MB
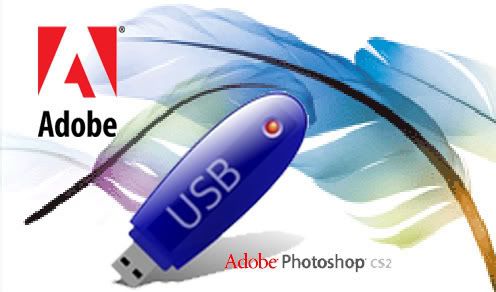
Tutorial ini di ambil dari Portable Aplications
As seen here at Adidap.com, is a link giving details on how to create a Portable Photoshop that can be taken with you on a thumbdrive. The drive does need to have 26 MB of space.
Here is the synopsis
1. Install Adobe Photoshop CS2, enter your serial registration, and activate the product.
2. Locate the directory in which Adobe Photoshop CS2 was installed.
3.Create a new directory called PCS2, on your computer and copy the following necessary files for Adobe Photoshop CS2 & Adobe ImageReady CS2 to operate:
\Program Files\Adobe\Photoshop CS2\ ->
ACE.dll
AdobeLM.dll
Adobelmsvc Installer.dll
AdobeUpdater.dll (generates error, program runs)
AdobeXMP.dll
agldt28l.dll
AGM.dll
asneu.dll
AXE8SharedExpat.dll
Bib.dll
BIBUtils.dll
CoolType.dll
epic_regs.dll (generates error, program runs, goodbye shortcuts)
FileInfo.dll (program runs, error on File>File Info)
libagluc28.dll
pdfsettings.dll
persresen_US.dll
Photoshop.dll
Plugin.dll
PSArt.dll
PSViews.dll
Tw10122.dat
VersionCue.dll
VersionCueUI.dll
\Program Files\Adobe\Photoshop CS2\\Activation\(your language/country)\tw12216.dat
\Program Files\Adobe\Photoshop CS2\\Required\*.*
\Documents & Settings\All Users\Application Data\Adobe Systems\Product licenses\B2B86000.dat
4. Go to the command prompt (Start -> Run -> Cmd) and copy paste the following command: (di Gunakan Untuk Mengambil File Registry Photshop ke dalam folder)
regedit /e c:\cs2.reg HKEY_LOCAL_MACHINE\SOFTWARE\Microsoft\Windows\CurrentVersion\Uninstall\{236BB7C4-4419-42FD-0409-1E257A25E34D}
5. Copy the file just created from c:\CS2.reg to the PCS2 folder created above.
6. Create a batch file called RunCs2.bat containing the following and save it is the PCS2 folder created above.
@echo off
@regedit /S CS2.reg
@md “%ALLUSERSPROFILE%\Application Data\Adobe Systems\Product licenses”
@copy B2B86000.dat “%ALLUSERSPROFILE%\Application Data\Adobe Systems\Product licenses”
@rem replace photoshop.exe by ImageReady.exe if you want to run image ready
@start Photoshop.exe
7. Create a file called UnCs2.reg and paste in it the following and save it is the PCS2 folder created above.
Windows Registry Editor Version 5.00
[-HKEY_LOCAL_MACHINE\SOFTWARE\Microsoft\Windows\CurrentVersion\Uninstall\{236BB7C4-4419-42FD-0409-1E257A25E34D}]
8. Finally create another batch file CleanCs2.bat containing the following and save it is the PCS2 folder created above.
@echo off
@regedit /S unCS2.reg
@del “%ALLUSERSPROFILE%\Application Data\Adobe Systems\Product licenses\B2B86000.dat”
Now when you want to run Adobe Photoshop CS2, just plug your thumb drive and run the batch file you have created RunCs2.bat
Also make sure to run CleanCs2.bat to clear all personal info from the computer after you finish using Adope Photoshop CS2.
Thanks......By : Bembenk
Free Web Hosting 100% Free (Gratis)

B![]()
| 250 MB of Disk Space Enough free disk space for your files and email | ||
| 100 GB Bandwidth! Lots of free data transfer for your website | ||
| Host your own domain We can host www.yourdomain.com or you can chose our free subdomain. | ||
| cPanel Powered Hosting Most advanced hosting control panel is ready for you. cPanel has features like: Webmail, File Manger, Backups, Password Protect Directories, Subdomains, Redirects, phpMyAdmin and much more... see demo | ||
| Host unlimited domains! Our unique members area allows you to create unlimited physical cPanel accounts. Have full control - Host as much accounts and domains as you need. | ||
| Over 500 website templates High quality website templates are available for download. Create your own unique web presence using pre-made designs and templates of the highest quality. Templates, logos and banners are available in Photoshop and HTML format - totally free. | ||
| Free POP3 Email Box Enjoy unrestricted POP3 email | ||
| Webmail access | ||
| FTP and Web based File Manager access | ||
| Unrestricted PHP with MySQL | ||
| ... and much much more that comes with cPanel, see DEMO | ||
| | ||
Our hosting service is totally free, you will never be charged. We guarantee absolutely no advertising! |
Great news: Since 2007-12-01 we do no require phone number verification by SMS message. Now everyone can register and start using our services in 5 minutes!
000webhost.com is making a revolution in web hosting industry. Look what we offer totally free: 250 MB disk space, 100 GB data transfer, cPanel access, full domain hosting allowed, backups, end user support and much much more.. With 000webhost.com your website will load lightning fast, and we have lots of features, sometimes even more you can get with paid hosting. Choose the new generation of free hosting!
No ads of any kind
Our promise to you - no catches, no setup fees, no forced advertising, no banners, no popups, no posting required and no hidden charges. Only totally free hosting service. We will never ask you to pay anything, you get everything for $0.00 - that is why we are called 000 webhost.
PHP and MySQL supported hosting
Unlike other free webhosts we do support PHP and MySQL with no restrictions. With 000webhost you get full access to the latest version of PHP (v5) and MySQL (v5).
cPanel control panel
We offer you unique service that no one else can give you free - cPanel hosting control panel. cPanel is the most popular panel among paid hosting providers, but 000webhost gives you it absolutely free! Enjoy the power of your hosting account with us. You can see cPanel demo here.
Real user support
No we will not leave you alone. If you have any questions or need help with your website feel free to submit help ticket any time. We are here to help you 24/7. Also if something will happen with server where your account is hosted, we will not leave you sit in the dark - in members area you will see status report what exactly is happening with server.
Finally.. what are your guarantees?
1. We own all servers. No one can shut down or reload any server with your data.
2. Bandwidth will never run out, we have dedicated 10mbit connection on each server.
3. All accounts are backed up every 30 days and stored on remote server. Also you can generate and download your account backup from cPanel 24 hours a day, 365 days a year.
Thanks......By : Bembenk
Genap 20 Tahun Sudah
P
erjalan Hidupku di dunia yang fana ini sudah lengkap 20 Tahun. Kehidupan yang ku jalani dengan penuh suka dan duka, bersama orang-orang yang aku cintai dan sayangi dan yang mudah-mudahan mencintai aku juga.
Thanks......By : Bembenk
Feeds For Label in Blogspot
Penasaran pengen tau link Feeds Buat Label di Blogger tuh apaan sebenarnya, Ya udah di coba-coba sendiri semua link-link feed Di Blogger
Untuk Feed Berita
http://bambangoke.blogspot.com/feeds/posts/default/
Untuk Feed Komentar
http://bambangoke.blogspot.com/feeds/comments/default/
Dari 2 Buah Link Feed untuk Berita dan Komentar saya berpikir bahwa mungkin saja Feed untuk Label adalah
http://bambangoke.blogspot.com/feeds/labels/default/
Terus saya coba buka link feed yang ada di pikiran saya di Browser Mozilla Firefox, Eh ternyata yang keluar bukannya feed malah
Blog yang Anda cari tidak ditemukan.
Kemudian saya coba minta Bantuan Google, pake kata kunci feed label blogger, Saya buka link urutan pertama yang di tampilkan google yaitu Blognya Blogger-Holic
Inilah Isi postingannya yang simpel BangetTerkadang pembaca blog ingin berlangganan hanya pada 1 label tertentu saja... Nah, gimana tuh caranya supaya bisa berlangganan hanya pada 1 label tersebut....? Sebenarnya caranya gampang banget. Kamu cuma harus tahu alamat feed per label blog.
http://blogkamu.blogspot.com/feeds/posts/default/-/namalabel
Ganti blogkamu.blogspot.com dengan alamat blog kamu. Selanjutnya, ganti namalabel dengan nama label yg diinginkan....
Singkat banget kan. that's all deh...
semoga ngebantu :)
Thanks......By : Bembenk
Subscribe to:
Posts (Atom)
